

Deploy a Soda Agent
Learn how to deploy a Soda Agent in a Kubernetes cluster.
The Soda environment has been updated since this tutorial.
Refer to v4 documentation for updated tutorials.
The Soda Agent is a tool that empowers Soda Cloud users to securely access data sources to scan for data quality. Create a Kubernetes cluster, then use Helm to deploy a self-hosted Soda Agent in the cluster.
This setup enables Soda Cloud users to securely connect to data sources (BigQuery, Snowflake, etc.) from within the Soda Cloud web application. Any user in your Soda Cloud account can add a new data source via the agent, then write their own no-code checks and agreements to check for data quality in the new data source. Alternatively, if you use a BigQuery, Databricks SQL, MS SQL Server, MySQL, PostgreSQL, Redshift, or Snowflake data source, you can use a secure, out-of-the-box Soda-hosted agent made available for every Soda Cloud organization.
As a step in the Get started roadmap, this guide offers instructions to set up, install, and configure Soda in a self-hosted agent deployment model.
Get started roadmap
Choose a flavor of SodaSet up Soda: self-hosted agent 📍 You are here! a. Create a Soda Cloud account b. Deploy a Soda Agent in a Kubernetes cluster c. Add a new data source
Write SodaCL checks
Run scans and review results
Organize, alert, investigate
Create a Soda Cloud account
The Soda Agent communicates with your Soda Cloud account using API public and private keys. Note that the keys a Soda Agent uses are different from the API keys Soda Library uses to connect to Soda Cloud.
If you have not already done so, create a Soda Cloud account at cloud.soda.io. If you already have a Soda account, log in.
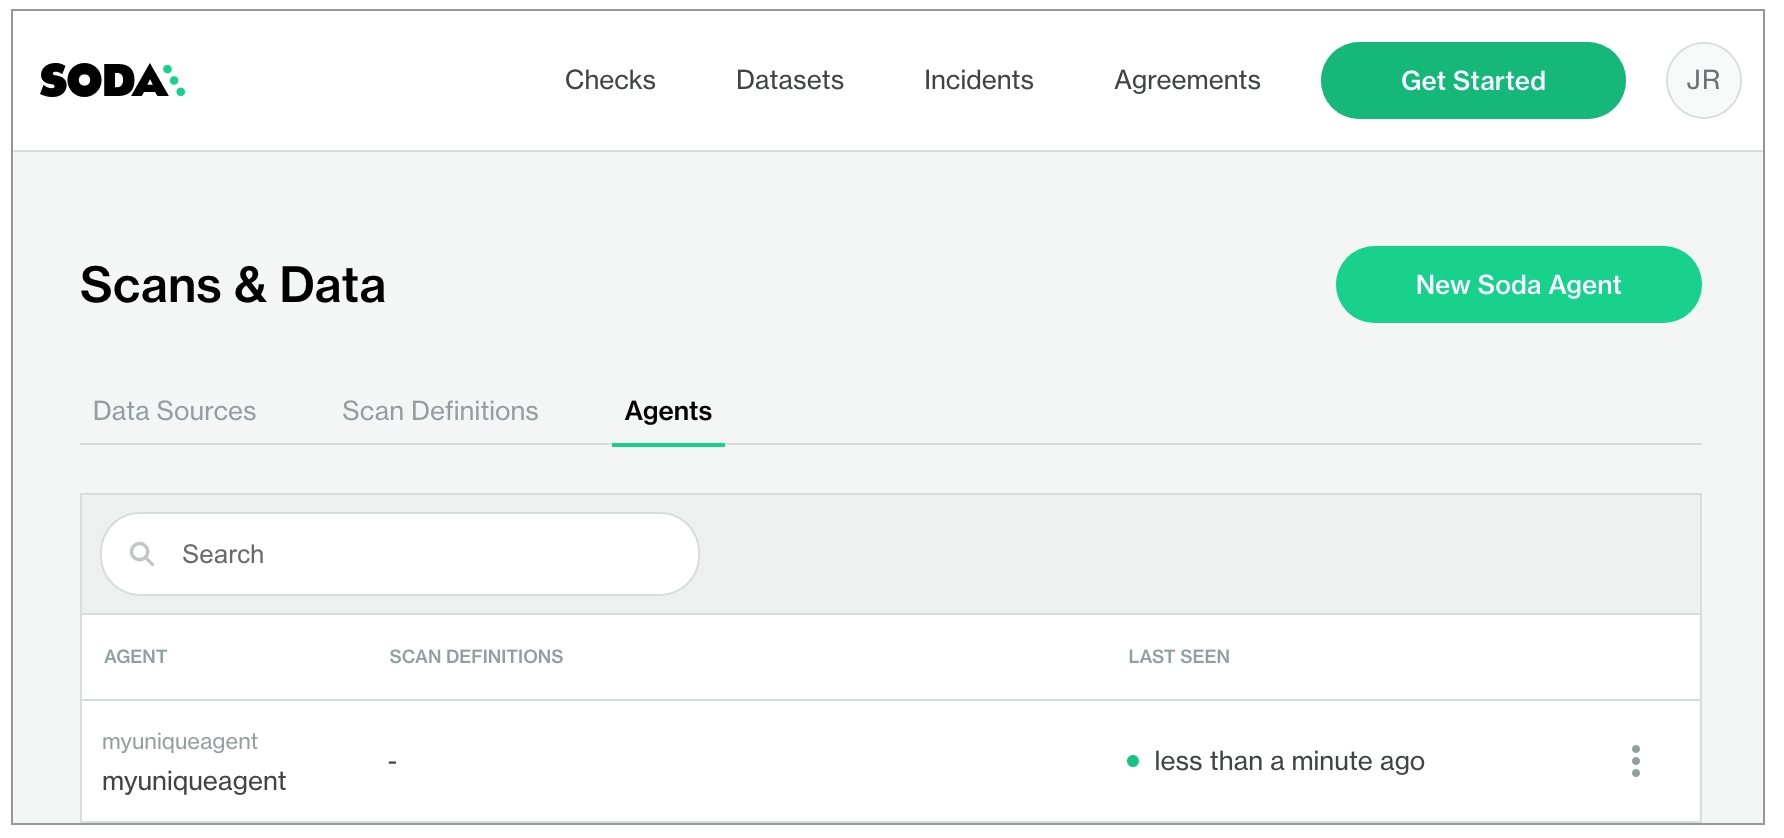
In your Soda Cloud account, navigate to your avatar > Data Sources, then navigate to the Agents tab. Click New Soda Agent.
The dialog box that appears offers abridged instructions to set up a new Soda Agent from the command-line; more thorough instructions exist in this documentation, below. For now, copy and paste the values for both the API Key ID and API Key Secret to a temporary, secure place in your local environment. You will need these values when you deploy the agent in your Kubernetes cluster.

You can keep the dialog box open in Soda Cloud, or close it.
Deploy a Soda Agent in a Kubernetes cluster
What follows are detailed deployment instructions according to the type of environment in which you create a cluster to deploy an agent. The high-level steps to complete the deployment remain the same regardless of environment.
(Optional) Familiarize yourself with basic Soda, Kubernetes, and Helm concepts.
Install, or confirm the installation of, a few required command-line tools.
Create a new Kubernetes cluster in your environment, or identify an existing cluster you can use to deploye a Soda Agent.
Deploy the Soda Agent in the cluster.
Verify the existence of your new Soda Agent in your Soda Cloud account.
Compatibility
Soda supports Kubernetes cluster version 1.21 or greater.
You can deploy a Soda Agent to connect with the following data sources:
Amazon Athena
Amazon Redshift
Azure Synapse
ClickHouse
Databricks SQL
Denodo
Dremio
DuckDB
GCP BigQuery
Google CloudSQL
IBM DB2
MotherDuck
MS SQL Server1
MS Fabric1
MySQL
OracleDB
PostgreSQL
Presto
Snowflake
Trino
Vertica
1 MS SQL Server/MS Fabric with Windows Authentication does not work with Soda Agent out-of-the-box.
These deployment instructions offer generic guidance for deploying a Soda Agent in a Kubernetes cluster.
Prerequisites
System requirements
Deploy an agent
Deploy using CLI only
Deploy using a values YAML file
About the helm install command
Decommission the Soda Agent and cluster
Troubleshoot deployment
Prerequisites
You have created, or have access to an existing Kubernetes cluster into which you can deploy a Soda Agent.
You have installed v1.22 or v1.23 of kubectl. This is the command-line tool you use to run commands against Kubernetes clusters. If you have installed Docker Desktop, kubectl is included out-of-the-box. With Docker running, use the command
kubectl version --output=yamlto check the version of an existing install.You have installed Helm. This is the package manager for Kubernetes which you will use to deploy the Soda Agent Helm chart. Run
helm versionto check the version of an existing install.
System requirements
Kubernetes cluster size and capacity: 2 CPU and 2GB of RAM. In general, this is sufficient to run up to six scans in parallel.
Scan performance may vary according to the workload, or the number of scans running in parallel. To improve performance for larger workloads, consider fine-tuning the cluster size using the resources parameter for the agent-orchestrator and soda.scanlauncher.resources for the scan-launcher. Adding more resources to the scan-launcher can improve scan times by as much as 30%. Be aware, however, that allocating too many resources may be costly relative to the small benefit of improved scan times.
To specify resources, add the following parameters to your values.yml file during deployment. Refer to Kubernetes documentation for Resource Management for Pods and Containers for information on values to supply for x.
For reference, a Soda-hosted agent specifies resources as follows:
Deploy an agent
The following table outlines the two ways you can install the Helm chart to deploy a Soda Agent in your cluster.
Install the Helm chart via CLI by providing values directly in the install command.
Use this as a straight-forward way of deploying an agent on a cluster in a secure or local environment.
Install the Helm chart via CLI by providing values in a values YAML file.
Use this as a way of deploying an agent on a cluster while keeping sensitive values secure. - provide sensitive API key values in this local file - store data source login credentials as environment variables in this local file or in an external secrets manager; Soda needs access to the credentials to be able to connect to your data source to run scans of your data. See: Soda Agent extras.
Deploy using CLI only
(Optional) You have familarized yourself with basic Soda, Kubernetes, and Helm concepts.
Add the Soda Agent Helm chart repository.
Use the following comand to install the Helm chart to deploy a Soda Agent in your custer. Learn more about the
helm installcommand.Replace the values of
soda.apikey.idandsoda-apikey.secretwith the values you copy+pasted from the New Soda Agent dialog box in your Soda Cloud account. By default, Soda uses Kubernetes Secrets as part of the Soda Agent deployment. The agent automatically converts any sensitive values you add to a values YAML file, or directly via the CLI, into Kubernetes Secrets.Replace the value of
soda.agent.namewith a custom name for you agent, if you wish.Specify the value for
soda.cloud.endpointaccording to your local region:https://cloud.us.soda.iofor the United States, orhttps://cloud.soda.iofor all else.(Optional) Specify the format for log output:
rawfor plain text, orjsonfor JSON format.(Optional) Specify the level of log information you wish to see when deploying the agent:
ERROR,WARN,INFO,DEBUG, orTRACE.The command-line produces output like the following message:
(Optional) Validate the Soda Agent deployment by running the following command:
In your Soda Cloud account, navigate to your avatar > Agents. Refresh the page to verify that you see the agent you just created in the list of Agents. Be aware that this may take several minutes to appear in your list of Soda Agents. Use the
describe podscommand in step 3 to check the status of the deployment. WhenState: RunningandReady: True, then you can refresh and see the agent in Soda Cloud.

If you do no see the agent listed in Soda Cloud, use the following command to review status and investigate the logs.
Deploy using a values YAML file
(Optional) You have familarized yourself with basic Soda, Kubernetes, and Helm concepts.
Create or navigate to an existing Kubernetes cluster in your environment in which you can deploy the Soda Agent helm chart.
Using a code editor, create a new YAML file called
values.yml.In that file, copy+paste the content below, replacing the following values:
idandsecretwith the values you copy+pasted from the New Soda Agent dialog box in your Soda Cloud account. By default, Soda uses Kubernetes Secrets as part of the Soda Agent deployment. The agent automatically converts any sensitive values you add to a values YAML file, or directly via the CLI, into Kubernetes Secrets.Replace the value of
namewith a custom name for your agent, if you wish.Specify the value for
endpointaccording to your local region:https://cloud.us.soda.iofor the United States, orhttps://cloud.soda.iofor all else.(Optional) Specify the format for log output:
rawfor plain text, orjsonfor JSON format.(Optional) Specify the level of log information you wish to see when deploying the agent:
ERROR,WARN,INFO,DEBUG, orTRACE.
Save the file. Then, in the same directory in which the
values.ymlfile exists, use the following command to install the Soda Agent helm chart.(Optional) Validate the Soda Agent deployment by running the following command:
In your Soda Cloud account, navigate to your avatar > Agents. Refresh the page to verify that you see the agent you just created in the list of Agents. Be aware that this may take several minutes to appear in your list of Soda Agents. Use the
describe podscommand in step three to check the status of the deployment. WhenState: RunningandReady: True, then you can refresh and see the agent in Soda Cloud.
If you do no see the agent listed in Soda Cloud, use the following command to review status and investigate the logs.
If you use private key authentication with a Soda Agent, refer to Soda Agent extras.
About the helm install command
helm install commandhelm install
the action helm is to take
soda-agent (the first one)
a release named soda-agent on your cluster
soda-agent (the second one)
the name of the helm repo you installed
soda-agent (the third one)
the name of the helm chart that is the Soda Agent
The --set options either override or set some of the values defined in and used by the Helm chart. You can override these values with the --set files as this command does, or you can specify the override values using a values.yml file.
--set soda.agent.name
A unique name for your Soda Agent. Choose any name you wish, as long as it is unique in your Soda Cloud account.
--set soda.apikey.id
With the apikey.secret, this connects the Soda Agent to your Soda Cloud account. Use the value you copied from the dialog box in Soda Cloud when adding a new agent. You can use a values.yml file to pass this value to the cluster instead of exposing it here.
--set soda.apikey.secret
With the apikey.id, this connects the Soda Agent to your Soda Cloud account. Use the value you copied from the dialog box in Soda Cloud when adding a new agent. You can use a values.yml file to pass this value to the cluster instead of exposing it here.
--set soda.agent.logFormat
(Optional) Specify the format for log output: raw for plain text, or json for JSON format.
--set soda.agent.loglevel
(Optional) Specify the leve of log information you wish to see when deploying the agent: ERROR, WARN, INFO, DEBUG, or TRACE.
--namespace soda-agent
Use the namespace value to identify the namespace in which to deploy the agent.
Decomission the Soda Agent and cluster
Uninstall the Soda Agent in the cluster.
Delete the cluster.
Troubleshoot deployment
Problem: After setting up a cluster and deploying the agent, you are unable to see the agent running in Soda Cloud.
Solution: The value you specify for the soda-cloud-enpoint must correspond with the region you selected when you signed up for a Soda Cloud account:
Use
https://cloud.us.soda.iofor the United StatesUse
https://cloud.soda.iofor all else
Problem: You need to define the outgoing port and IP address with which a self-hosted Soda Agent can communicate with Soda Cloud. Soda Agent does not require setting any inbound rules as it only polls Soda Cloud looking for instruction, which requires only outbound communication. When Soda Cloud must deliver instructions, the Soda Agent opens a bidirectional channel.
Solution: Use port 443 and passlist the fully-qualified domain names for Soda Cloud:
cloud.us.soda.iofor Soda Cloud account created in the US region ORcloud.soda.iofor Soda Cloud account created in the EU region ANDcollect.soda.io
These deployment instructions offer guidance for setting up an Amazon Elastic Kubernetes Service (EKS) cluster and deploying a Soda Agent in it.
Prerequisites
System requirements
Deploy an agent
Deploy using CLI only
Deploy using a values YAML file
(Optional) Connect via AWS PrivateLink
About the helm install command
Decommission the Soda Agent and the EKS cluster
Troubleshoot deployment
Prerequisites
You have an AWS account and the necessary permissions to enable you to create, or gain access to an EKS cluster in your region.
You have installed v1.22 or v1.23 of kubectl. This is the command-line tool you use to run commands against Kubernetes clusters. If you have installed Docker Desktop, kubectl is included out-of-the-box. Run
kubectl version --output=yamlto check the version of an existing install.You have installed Helm. This is the package manager for Kubernetes which you will use to deploy the Soda Agent Helm chart. Run
helm versionto check the version of an existing install.
System requirements
Kubernetes cluster size and capacity: 2 CPU and 2GB of RAM. In general, this is sufficient to run up to six scans in parallel.
Scan performance may vary according to the workload, or the number of scans running in parallel. To improve performance for larger workloads, consider:
fine-tuning the cluster size using the
resourcesparameter for theagent-orchestratorandsoda.scanlauncher.resourcesfor thescan-launcher. Adding more resources to thescan-launchercan improve scan times by as much as 30%.adding more nodes to the node group; see AWS documentation for Scaling Managed Nodegroups.
adding a cluster auto-scaler to your Kubernetes cluster; see AWS documentation for Autoscaling
Be aware, however, that allocating too many resources may be costly relative to the small benefit of improved scan times.
To specify resources, add the following parameters to your values.yml file during deployment. Refer to Kubernetes documentation for Resource Management for Pods and Containers for information on values to supply for x.
For reference, a Soda-hosted agent specifies resources as follows:
Deploy an agent
The following table outlines the two ways you can install the Helm chart to deploy a Soda Agent in your cluster.
Install the Helm chart via CLI by providing values directly in the install command.
Use this as a straight-forward way of deploying an agent on a cluster.
Install the Helm chart via CLI by providing values in a values YAML file.
Use this as a way of deploying an agent on a cluster while keeping sensitive values secure. - provide sensitive API key values in this local file - store data source login credentials as environment variables in this local file or in an external secrets manager; Soda needs access to the credentials to be able to connect to your data source to run scans of your data. See: Soda Agent extras.
Deploy using CLI only
(Optional) You have familarized yourself with basic Soda, Kubernetes, and Helm concepts.
(Optional) If you wish, you can establish an AWS PrivateLink to provide private connectivity with Soda Cloud. Refer to Connect via AWS PrivateLink before deploying an agent.
(Optional) If you are deploying to an existing Virtual Private Cloud (VPC), consider supplying public or private subnets with your deployment. Consult the eksctl documentation to Use existing VPC.
Create or navigate to an existing Kubernetes cluster in your environment in which you can deploy the Soda Agent helm chart. Best practices advises creating a managed node group into which you can deploy the agent.
Use Helm to add the Soda Agent Helm chart repository.
Use the following command to install the Helm chart which deploys a Soda Agent in your custer.
Replace the values of
soda.apikey.idandsoda-apikey.secretwith the values you copy+pasted from the New Soda Agent dialog box in your Soda Cloud. By default, Soda uses Kubernetes Secrets as part of the Soda Agent deployment. The agent automatically converts any sensitive values you add to a values YAML file, or directly via the CLI, into Kubernetes Secrets.Replace the value of
soda.agent.namewith a custom name for your agent, if you wish.Specify the value for
soda.cloud.endpointaccording to your local region:https://cloud.us.soda.iofor the United States, orhttps://cloud.soda.iofor all else.(Optional) Specify the format for log output:
rawfor plain text, orjsonfor JSON format.(Optional) Specify the level of log information you wish to see when deploying the agent:
ERROR,WARN,INFO,DEBUG, orTRACE.Read more about the
helm installcommand.The command-line produces output like the following message:
(Optional) Validate the Soda Agent deployment by running the following command:
In your Soda Cloud account, navigate to your avatar > Agents. Refresh the page to verify that you see the agent you just created in the list of Agents. Be aware that this may take several minutes to appear in your list of Soda Agents. Use the
describe podscommand in step 3 to check the status of the deployment. WhenState: RunningandReady: True, then you can refresh and see the agent in Soda Cloud.

If you do no see the agent listed in Soda Cloud, use the following command to review status and investigate the logs.
Deploy using a values YAML file
(Optional) You have familarized yourself with basic Soda, Kubernetes, and Helm concepts.
(Optional) If you wish, you can establish an AWS PrivateLink to provide private connectivity with Soda Cloud. Refer to Connect via AWS PrivateLink before deploying an agent.
(Optional) If you are deploying to an existing Virtual Private Cloud (VPC), consider supplying public or private subnets with your deployment. Consult the eksctl documentation to Use existing VPC.
Create or navigate to an existing Kubernetes cluster in your environment in which you can deploy the Soda Agent helm chart. Best practices advises creating a managed node group into which you can deploy the agent.
Using a code editor, create a new YAML file called
values.yml.To that file, copy+paste the content below, replacing the following values:
idandsecretwith the values you copy+pasted from the New Soda Agent dialog box in your Soda Cloud account. By default, Soda uses Kubernetes Secrets as part of the Soda Agent deployment. The agent automatically converts any sensitive values you add to a values YAML file, or directly via the CLI, into Kubernetes Secrets.Replace the value of
namewith a custom name for your agent, if you wish.Specify the value for
endpointaccording to your local region:https://cloud.us.soda.iofor the United States, orhttps://cloud.soda.iofor all else.(Optional) Specify the format for log output:
rawfor plain text, orjsonfor JSON format.(Optional) Specify the level of log information you wish to see when deploying the agent:
ERROR,WARN,INFO,DEBUG, orTRACE.
Save the file. Then, in the same directory in which the
values.ymlfile exists, use the following command to install the Soda Agent helm chart.(Optional) Validate the Soda Agent deployment by running the following command:
In your Soda Cloud account, navigate to your avatar > Agents. Refresh the page to verify that you see the agent you just created in the list of Agents. Be aware that this may take several minutes to appear in your list of Soda Agents. Use the
describe podscommand in step four to check the status of the deployment. WhenState: RunningandReady: True, then you can refresh and see the agent in Soda Cloud.

If you do no see the agent listed in Soda Cloud, use the following command to review status and investigate the logs.
(Optional) Connect via AWS PrivateLink
If you use AWS services for your infrastructure and you have deployed or will deploy a Soda Agent in an EKS cluster, you can use an AWS PrivateLink to provide private connectivity with Soda Cloud.
Log in to your AWS console and navigate to your VPC dashboard.
Follow the AWS documentation to Connect to an endpoint service as the service customer. For security reasons, Soda does not publish its Service name. Email [email protected] with your AWS account ID to request the PrivateLink service name. Refer to AWS documentation for instructions on how to obtain your account ID.
After creating the endpoint, return to the VPC dashboard. When the status of the endpoint becomes Available, the PrivateLink is ready to use. Be aware that this make take more than 10 minutes.
Deploy a Soda Agent to your AWS EKS cluster, or, if you have already deployed one, restart your Soda Agent to begin sending data to Soda Cloud via the PrivateLink.
After you have started the agent and validated that it is running, log into your Soda Cloud account, then navigate to your avatar > Agents. Refresh the page to verify that you see the agent you just created in the list of Agents.

If you do no see the agent listed in Soda Cloud, use the following command to review status and investigate the logs.
About the helm install command
helm install commandhelm install
the action helm is to take
soda-agent (the first one)
a release named soda-agent on your cluster
soda-agent (the second one)
the name of the helm repo you installed
soda-agent (the third one)
the name of the helm chart that is the Soda Agent
The --set options either override or set some of the values defined in and used by the Helm chart. You can override these values with the --set files as this command does, or you can specify the override values using a values.yml file.
--set soda.agent.name
A unique name for your Soda Agent. Choose any name you wish, as long as it is unique in your Soda Cloud account.
--set soda.apikey.id
With the apikey.secret, this connects the Soda Agent to your Soda Cloud account. Use the value you copied from the dialog box in Soda Cloud when adding a new agent. You can use a values.yml file to pass this value to the cluster instead of exposing it here.
--set soda.apikey.secret
With the apikey.id, this connects the Soda Agent to your Soda Cloud account. Use the value you copied from the dialog box in Soda Cloud when adding a new agent. You can use a values.yml file to pass this value to the cluster instead of exposing it here.
--set soda.agent.logFormat
(Optional) Specify the format for log output: raw for plain text, or json for JSON format.
--set soda.agent.loglevel
(Optional) Specify the leve of log information you wish to see when deploying the agent: ERROR, WARN, INFO, DEBUG, or TRACE.
--namespace soda-agent
Use the namespace value to identify the namespace in which to deploy the agent.
Decommission the Soda Agent and the EKS cluster
Uninstall the Soda Agent in the cluster.
Delete the EKS cluster itself.
(Optional) Access your CloudFormation console, then click Stacks to view the status of your decommissioned cluster. If you do not see your Stack, use the region drop-down menu at upper-right to select the region in which you created the cluster.
Troubleshoot deployment
Problem: After setting up a cluster and deploying the agent, you are unable to see the agent running in Soda Cloud.
Solution: The value you specify for the soda-cloud-enpoint must correspond with the region you selected when you signed up for a Soda Cloud account:
Use
https://cloud.us.soda.iofor the United StatesUse
https://cloud.soda.iofor all else
Problem: You need to define the outgoing port and IP address with which a self-hosted Soda Agent can communicate with Soda Cloud. Soda Agent does not require setting any inbound rules as it only polls Soda Cloud looking for instruction, which requires only outbound communication. When Soda Cloud must deliver instructions, the Soda Agent opens a bidirectional channel.
Solution: Use port 443 and passlist the fully-qualified domain names for Soda Cloud:
cloud.us.soda.iofor Soda Cloud account created in the US region ORcloud.soda.iofor Soda Cloud account created in the EU region ANDcollect.soda.io
Problem: UnauthorizedOperation: You are not authorized to perform this operation.
Solution: This error indicates that your user profile is not authorized to create the cluster. Contact your AWS Administrator to request the appropriate permissions.
These deployment instructions offer guidance for setting up an Azure Kubernetes Service (AKS) cluster and deploying a Soda Agent in it.
Prerequisites
System requirements
Deploy an agent
Deploy using CLI only
Deploy using a values YAML file
About the helm install command
Decommission the Soda Agent and the AKS cluster
Troubleshoot deployment
Prerequisites
You have an Azure account and the necessary permissions to enable you to create, or gain access to an existing AKS cluster in your region. Consult the Azure access control documentation for details.
You have installed the Azure CLI tool. This is the command-line tool you need to access your Azure account from the command-line. Run
az --versionto check the version of an existing install. Consult the Azure Command-Line Interface documentation for details.You have logged in to your Azure account. Run
az loginto open a browser and log in to your account.You have installed v1.22 or v1.23 of kubectl. This is the command-line tool you use to run commands against Kubernetes clusters. If you have already installed the Azure CLI tool, you can install kubectl using the following command:
az aks install-cli. Runkubectl version --output=yamlto check the version of an existing install.You have installed Helm. This is the package manager for Kubernetes which you will use to deploy the Soda Agent Helm chart. Run
helm versionto check the version of an existing install.
System requirements
Kubernetes cluster size and capacity: 2 CPU and 2GB of RAM. In general, this is sufficient to run up to six scans in parallel.
Scan performance may vary according to the workload, or the number of scans running in parallel. To improve performance for larger workloads, consider fine-tuning the cluster size using the resources parameter for the agent-orchestrator and soda.scanlauncher.resources for the scan-launcher. Adding more resources to the scan-launcher can improve scan times by as much as 30%. Be aware that allocating too many resources may be costly relative to the small benefit of improved scan times.
To specify resources, add the following parameters to your values.yml file during deployment. Refer to Kubernetes documentation for Resource Management for Pods and Containers for information on values to supply for x.
For reference, a Soda-hosted agent specifies resources as follows:
Deploy an agent
The following table outlines the ways you can install the Helm chart to deploy a Soda Agent in your cluster.
Install the Helm chart via CLI by providing values directly in the install command.
Use this as a straight-forward way of deploying an agent on a cluster.
Install the Helm chart via CLI by providing values in a values YAML file.
Use this as a way of deploying an agent on a cluster while keeping sensitive values secure. - provide sensitive API key values in this local file or in an external secrets manager - store data source login credentials as environment variables in this local file; Soda needs access to the credentials to be able to connect to your data source to run scans of your data. See: Soda Agent extras.
Deploy using CLI only
(Optional) You have familiarized yourself with basic Soda, Kubernetes, and Helm concepts.
Create or navigate to an existing Kubernetes cluster in your environment in which you can deploy the Soda Agent helm chart.
Use Helm to add the Soda Agent Helm chart repository.
Use the following command to install the Helm chart which deploys a Soda Agent in your cluster. (Learn more about the
helm installcommand.)Replace the values of
soda.apikey.idandsoda-apikey.secretwith the values you copy+pasted from the New Soda Agent dialog box in your Soda Cloud. By default, Soda uses Kubernetes Secrets as part of the Soda Agent deployment. The agent automatically converts any sensitive values you add to a values YAML file, or directly via the CLI, into Kubernetes Secrets.Replace the value of
soda.agent.namewith a custom name for your agent, if you wish.Specify the value for
soda.cloud.endpointaccording to your local region:https://cloud.us.soda.iofor the United States, orhttps://cloud.soda.iofor all else.(Optional) Specify the format for log output:
rawfor plain text, orjsonfor JSON format.(Optional) Specify the level of log information you wish to see when deploying the agent:
ERROR,WARN,INFO,DEBUG, orTRACE.The command-line produces output like the following message:
(Optional) Validate the Soda Agent deployment by running the following command:
In your Soda Cloud account, navigate to your avatar > Agents. Refresh the page to verify that you see the agent you just created in the list of Agents. Be aware that this may take several minutes to appear in your list of Soda Agents.
If you do no see the agent listed in Soda Cloud, use the following command to review status and investigate the logs.
Deploy using a values YAML file
(Optional) You have familiarized yourself with basic Soda, Kubernetes, and Helm concepts.
Create or navigate to an existing Kubernetes cluster in your environment in which you can deploy the Soda Agent helm chart.
Use Helm to add the Soda Agent Helm chart repository.
Using a code editor, create a new YAML file called
values.yml.To that file, copy+paste the content below, replacing the following values:
idandsecretwith the values you copy+pasted from the New Soda Agent dialog box in your Soda Cloud account. By default, Soda uses Kubernetes Secrets as part of the Soda Agent deployment. The agent automatically converts any sensitive values you add to a values YAML file, or directly via the CLI, into Kubernetes Secrets.Replace the value of
namewith a custom name for your agent, if you wish.Specify the value for
endpointaccording to your local region:https://cloud.us.soda.iofor the United States, orhttps://cloud.soda.iofor all else.(Optional) Specify the format for log output:
rawfor plain text, orjsonfor JSON format.(Optional) Specify the level of log information you wish to see when deploying the agent:
ERROR,WARN,INFO,DEBUG, orTRACE.
Save the file. Then, create a namespace for the agent.
In the same directory in which the
values.ymlfile exists, use the following command to install the Soda Agent helm chart.(Optional) Validate the Soda Agent deployment by running the following command:
In your Soda Cloud account, navigate to your avatar > Agents. Refresh the page to verify that you see the agent you just created in the list of Agents.
If you do no see the agent listed in Soda Cloud, use the following command to review status and investigate the logs.
About the helm install command
helm install commandhelm install
the action helm is to take
soda-agent (the first one)
a release named soda-agent on your cluster
soda-agent (the second one)
the name of the helm repo you installed
soda-agent (the third one)
the name of the helm chart that is the Soda Agent
The --set options either override or set some of the values defined in and used by the Helm chart. You can override these values with the --set files as this command does, or you can specify the override values using a values.yml file.
Decommission the Soda Agent and the AKS cluster
Delete everything in the namespace which you created for the Soda Agent.
Delete the cluster. Be patient; this task may take some time to complete.
Troubleshoot deployment
Problem: After setting up a cluster and deploying the agent, you are unable to see the agent running in Soda Cloud.
Solution: The value you specify for the soda-cloud-enpoint must correspond with the region you selected when you signed up for a Soda Cloud account:
Use
https://cloud.us.soda.iofor the United StatesUse
https://cloud.soda.iofor all else
Problem: You need to define the outgoing port and IP address with which a self-hosted Soda Agent can communicate with Soda Cloud. Soda Agent does not require setting any inbound rules as it only polls Soda Cloud looking for instruction, which requires only outbound communication. When Soda Cloud must deliver instructions, the Soda Agent opens a bidirectional channel.
Solution: Use port 443 and passlist the fully-qualified domain names for Soda Cloud:
cloud.us.soda.iofor Soda Cloud account created in the US region ORcloud.soda.iofor Soda Cloud account created in the EU region ANDcollect.soda.io
Problem: When you attempt to create a cluster, you get an error that reads, An RSA key file or key value must be supplied to SSH Key Value. You can use --generate-ssh-keys to let CLI generate one for you.
Solution: Run the same command to create a cluster but include an extra line at the end to generate RSA keys.
These deployment instructions offer guidance for setting up a Google Kubernetes Engine (GKE) cluster and deploying a Soda Agent in it.
Prerequisites
System requirements
Deploy an agent
Deploy using CLI only
Deploy using a values YAML file
About the helm install command
Decommission the Soda Agent and cluster
Troubleshoot deployment
Prerequisites
You have a Google Cloud Platform (GCP) account and the necessary permissions to enable you to create, or gain access to an existing Google Kubernetes Engine (GKE) cluster in your region.
You have installed the gcloud CLI tool. Use the command
glcoud versionto verify the version of an existing install.If you have already installed the gcloud CLI, use the following commands to login and verify your configuration settings, respectively:
gcloud auth logingcloud config listIf you are installing the gcloud CLI for the first time, be sure to complete all the steps in the installation to properly install and configure the setup.
Consider using the following command to learn a few basic glcoud commands:
gcloud cheat-sheet.
You have installed v1.22 or v1.23 of kubectl. This is the command-line tool you use to run commands against Kubernetes clusters. If you have installed Docker Desktop, kubectl is included out-of-the-box. With Docker running, use the command
kubectl version --output=yamlto check the version of an existing install.You have installed Helm. This is the package manager for Kubernetes which you will use to deploy the Soda Agent Helm chart. Run
helm versionto check the version of an existing install.
System requirements
Kubernetes cluster size and capacity: 2 CPU and 2GB of RAM. In general, this is sufficient to run up to six scans in parallel.
Scan performance may vary according to the workload, or the number of scans running in parallel. To improve performance for larger workloads, consider fine-tuning the cluster size using the resources parameter for the agent-orchestrator and soda.scanlauncher.resources for the scan-launcher. Adding more resources to the scan-launcher can improve scan times by as much as 30%. Be aware, however, that allocating too many resources may be costly relative to the small benefit of improved scan times.
To specify resources, add the following parameters to your values.yml file during deployment. Refer to Kubernetes documentation for Resource Management for Pods and Containers for information on values to supply for x.
For reference, a Soda-hosted agent specifies resources as follows:
Deploy an Agent
The following table outlines the two ways you can install the Helm chart to deploy a Soda Agent in your cluster.
Install the Helm chart via CLI by providing values directly in the install command.
Use this as a straight-forward way of deploying an agent on a cluster in a secure or local environment.
Install the Helm chart via CLI by providing values in a values YAML file.
Use this as a way of deploying an agent on a cluster while keeping sensitive values secure. - provide sensitive API key values in this local file - store data source login credentials as environment variables in this local file or in an external secrets manager; Soda needs access to the credentials to be able to connect to your data source to run scans of your data. See: Soda Agent extras.
Deploy using CLI only
(Optional) You have familiarized yourself with basic Soda, Kubernetes, and Helm concepts.
Create or navigate to an existing Kubernetes cluster in your environment in which you can deploy the Soda Agent helm chart.
Add the Soda Agent Helm chart repository.
Use the following command to install the Helm chart to deploy a Soda Agent in your custer. (Learn more about the
helm installcommand.)Replace the values of
soda.apikey.idandsoda-apikey.secretwith the values you copy+pasted from the New Soda Agent dialog box in your Soda Cloud account. By default, Soda uses Kubernetes Secrets as part of the Soda Agent deployment. The agent automatically converts any sensitive values you add to a values YAML file, or directly via the CLI, into Kubernetes Secrets.Replace the value of
soda.agent.namewith a custom name for your agent, if you wish.Specify the value for
soda.cloud.endpointaccording to your local region:https://cloud.us.soda.iofor the United States, orhttps://cloud.soda.iofor all else.(Optional) Specify the format for log output:
rawfor plain text, orjsonfor JSON format.(Optional) Specify the level of log information you wish to see when deploying the agent:
ERROR,WARN,INFO,DEBUG, orTRACE.The command-line produces output like the following message:
(Optional) Validate the Soda Agent deployment by running the following command:
In your Soda Cloud account, navigate to your avatar > Agents. Refresh the page to verify that you see the agent you just created in the list of Agents. Be aware that this may take several minutes to appear in your list of Soda Agents. Use the
describe podscommand in step three to check the status of the deployment. WhenStatus: Running, then you can refresh and see the agent in Soda Cloud.

If you do no see the agent listed in Soda Cloud, use the following command to review status and investigate the logs.
Deploy using a values YAML file
(Optional) You have familiarized yourself with basic Soda, Kubernetes, and Helm concepts.
Create or navigate to an existing Kubernetes cluster in your environment in which you can deploy the Soda Agent helm chart.
Using a code editor, create a new YAML file called
values.yml.In that file, copy+paste the content below, replacing the following values:
idandsecretwith the values you copy+pasted from the New Soda Agent dialog box in your Soda Cloud account. By default, Soda uses Kubernetes Secrets as part of the Soda Agent deployment. The agent automatically converts any sensitive values you add to a values YAML file, or directly via the CLI, into Kubernetes Secrets.Replace the value of
namewith a custom name for your agent, if you wish.Specify the value for
endpointaccording to your local region:https://cloud.us.soda.iofor the United States, orhttps://cloud.soda.iofor all else.(Optional) Specify the format for log output:
rawfor plain text, orjsonfor JSON format.(Optional) Specify the level of log information you wish to see when deploying the agent:
ERROR,WARN,INFO,DEBUG, orTRACE.
Save the file. Then, in the same directory in which the
values.ymlfile exists, use the following command to install the Soda Agent helm chart.(Optional) Validate the Soda Agent deployment by running the following command:
In your Soda Cloud account, navigate to your avatar > Agents. Refresh the page to verify that you see the agent you just created in the list of Agents. Be aware that this may take several minutes to appear in your list of Soda Agents. Use the
describe podscommand in step four to check the status of the deployment. WhenStatus: Running, then you can refresh and see the agent in Soda Cloud.

If you do no see the agent listed in Soda Cloud, use the following command to review status and investigate the logs.
About the helm install command
helm install commandhelm install
the action helm is to take
soda-agent (the first one)
a release named soda-agent on your cluster
soda-agent (the second one)
the name of the helm repo you installed
soda-agent (the third one)
the name of the helm chart that is the Soda Agent
The --set options either override or set some of the values defined in and used by the Helm chart. You can override these values with the --set files as this command does, or you can specify the override values using a values.yml file.
--set soda.agent.name
A unique name for your Soda Agent. Choose any name you wish, as long as it is unique in your Soda Cloud account.
--set soda.apikey.id
With the apikey.secret, this connects the Soda Agent to your Soda Cloud account. Use the value you copied from the dialog box in Soda Cloud when adding a new agent. You can use a values.yml file to pass this value to the cluster instead of exposing it here.
--set soda.apikey.secret
With the apikey.id, this connects the Soda Agent to your Soda Cloud account. Use the value you copied from the dialog box in Soda Cloud when adding a new agent. You can use a values.yml file to pass this value to the cluster instead of exposing it here.
--set soda.agent.logFormat
(Optional) Specify the format for log output: raw for plain text, or json for JSON format.
--set soda.agent.loglevel
(Optional) Specify the leve of log information you wish to see when deploying the agent: ERROR, WARN, INFO, DEBUG, or TRACE.
--namespace soda-agent
Use the namespace value to identify the namespace in which to deploy the agent.
Decommission the Soda Agent and cluster
Uninstall the Soda Agent in the cluster.
Delete the cluster.
Refer to Google Kubernetes Engine documentation for details.
Troubleshoot deployment
Problem: After setting up a cluster and deploying the agent, you are unable to see the agent running in Soda Cloud.
Solution: The value you specify for the soda-cloud-enpoint must correspond with the region you selected when you signed up for a Soda Cloud account:
Use
https://cloud.us.soda.iofor the United StatesUse
https://cloud.soda.iofor all else
Problem: You need to define the outgoing port and IP address with which a self-hosted Soda Agent can communicate with Soda Cloud. Soda Agent does not require setting any inbound rules as it only polls Soda Cloud looking for instruction, which requires only outbound communication. When Soda Cloud must deliver instructions, the Soda Agent opens a bidirectional channel.
Solution: Use port 443 and passlist the fully-qualified domain names for Soda Cloud:
cloud.us.soda.iofor Soda Cloud account created in the US region ORcloud.soda.iofor Soda Cloud account created in the EU region ANDcollect.soda.io
Add a new data source
In your Soda Cloud account, navigate to your avatar > Data Sources. Click New Data Source, then follow the guided steps to create a new data source. Refer to the sections below for insight into the values to enter in the fields and editing panels in the guided steps.
1. Attributes
Data Source Label
Provide a unique identifier for the data source. Soda Cloud uses the label you provide to define the immutable name of the data source against which it runs the Default Scan.
Default Scan Agent
Select the Soda-hosted agent, or the name of a Soda Agent that you have previously set up in your secure environment. This identifies the Soda Agent to which Soda Cloud must connect in order to run its scan.
Check Schedule
Provide the scan frequency details Soda Cloud uses to execute scans according to your needs. If you wish, you can define the schedule as a cron expression.
Starting At
Select the time of day to run the scan. The default value is midnight.
Cron Expression
(Optional) Write your own cron expression to define the schedule Soda Cloud uses to run scans.
Anomaly Dashboard Scan Schedule (Available in 2025)
Provide the scan frequency details Soda Cloud uses to execute a daily scan to automatically detect anomalies for the anomaly dashboard.
2. Connect
In the editing panel, provide the connection configurations Soda Cloud needs to be able to access the data in the data source. Connection configurations are data source-specific and include values for things such as a database's host and access credentials.
To more securely provide sensitive values such as usernames and passwords, use environment variables in a values.yml file when you deploy the Soda Agent. See Use environment variables for data source connection credentials for details.
Access the data source-specific connection configurations listed below to copy+paste the connection syntax into the editing panel, then adjust the values to correspond with your data source's details. Access connection configuration details in [Data source reference section of Soda documentation.
See also: Use a file reference for a BigQuery data source connection
3. Discover
During its initial scan of your datasource, Soda Cloud discovers all the datasets the data source contains. It captures basic information about each dataset, including a dataset names and the columns each contains.
In the editing panel, specify the datasets that Soda Cloud must include or exclude from this basic discovery activity. The default syntax in the editing panel instructs Soda to collect basic dataset information from all datasets in the data source except those with names that begin with test_. The % is a wildcard character. See Add dataset discovery for more detail on profiling syntax.
Known issue: SodaCL does not support using variables in column profiling and dataset discovery configurations.
4. Profile
To gather more detailed profile information about datasets in your data source and automatically build an anomaly dashboard for data quality observability (preview, only), you can configure Soda Cloud to profile the columns in datasets.
Profiling a dataset produces two tabs' worth of data in a dataset page:
In the Columns tab, you can see column profile information including details such as the calculated mean value of data in a column, the maximum and minimum values in a column, and the number of rows with missing data.
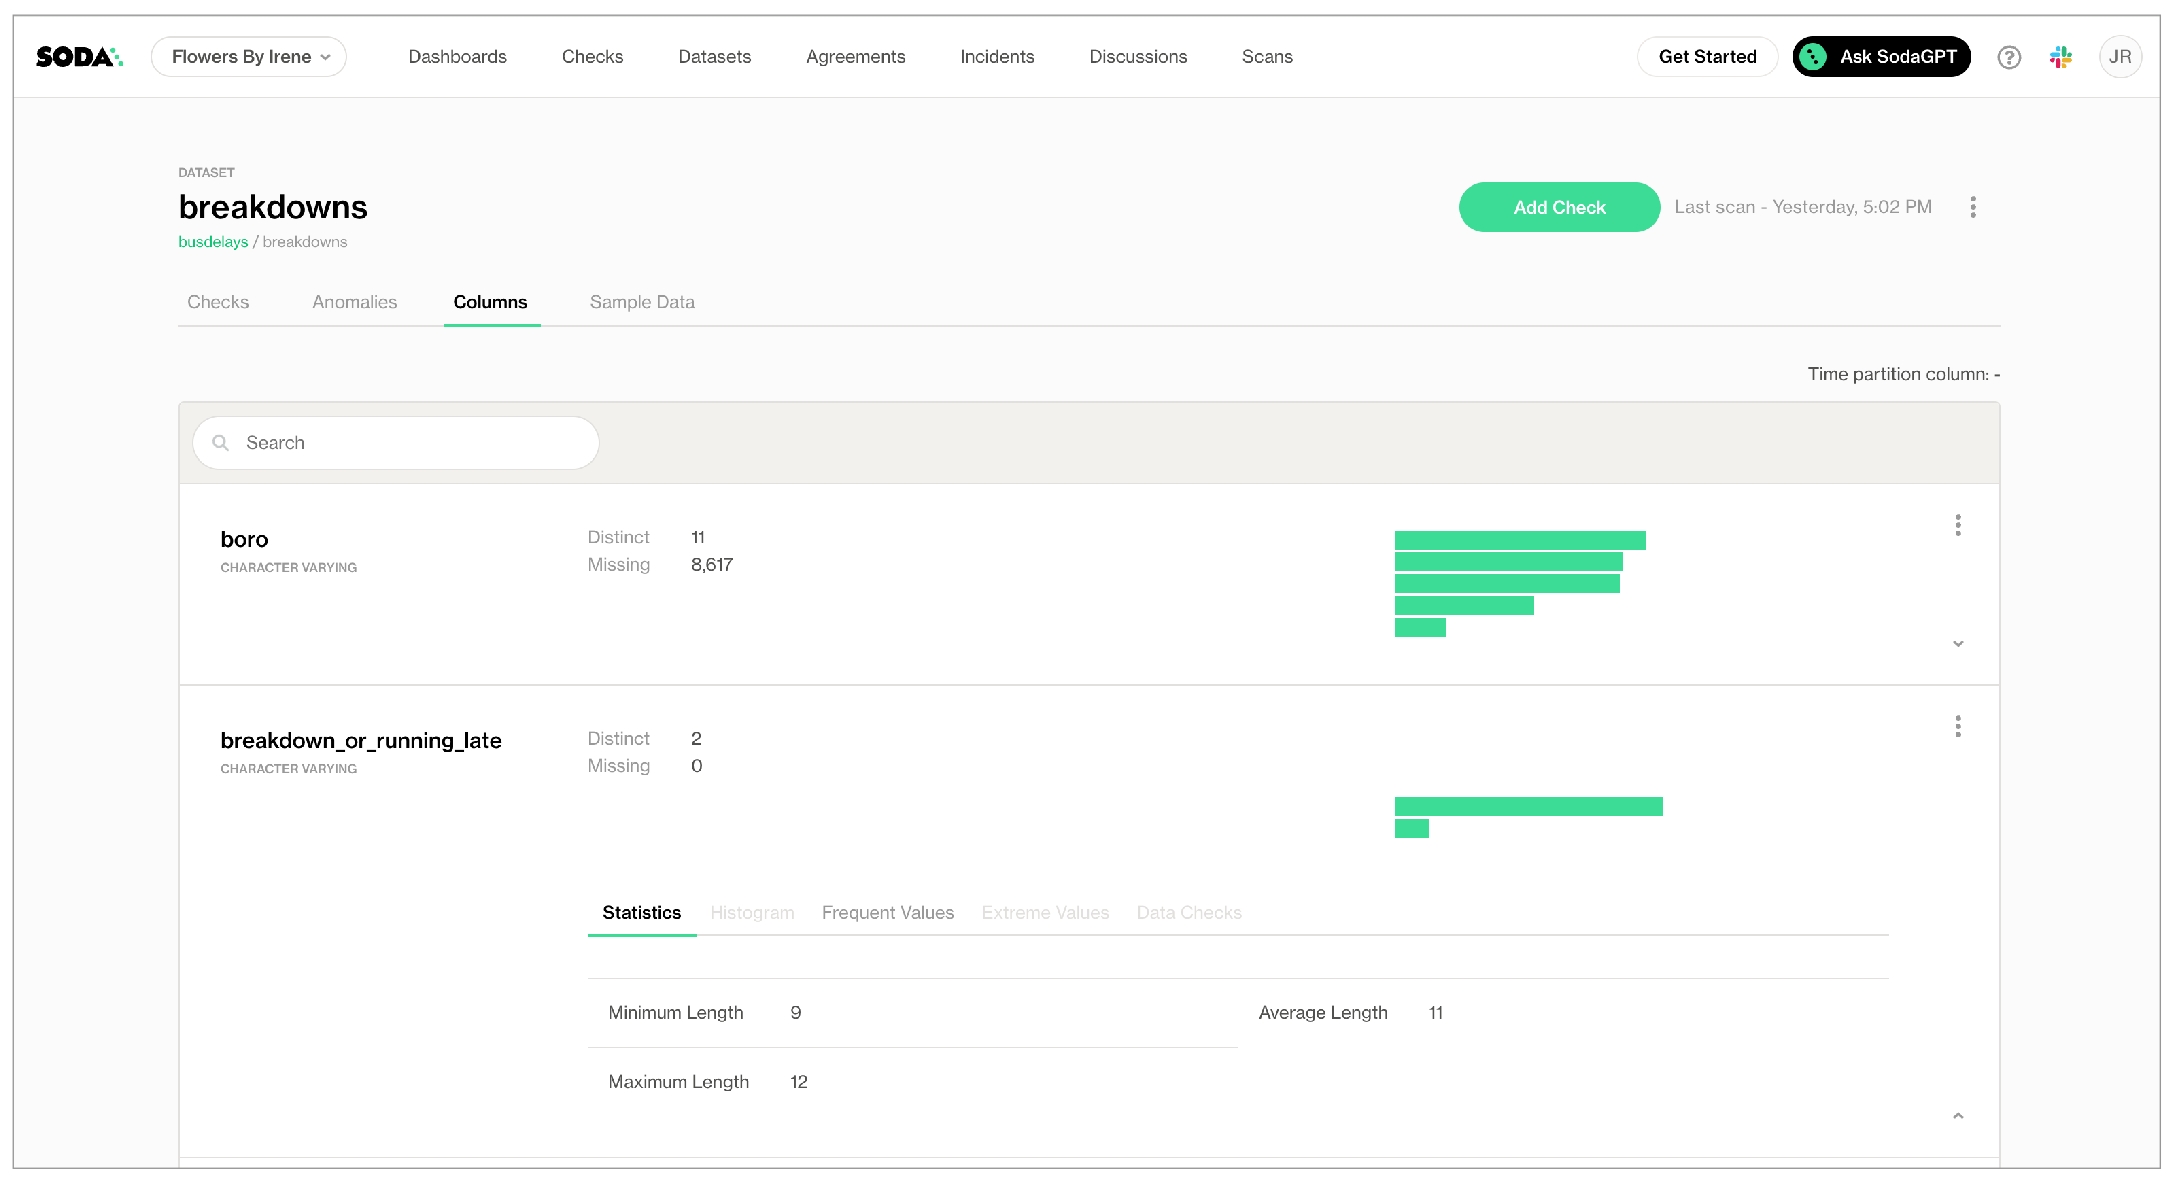
In the Anomalies tab, you can access an out-of-the-box anomaly dashboard that uses the column profile information to automatically begin detecting anomalies in your data relative to the patterns the machine learning algorithm learns over the course of approximately five days. Learn more (available in 2025)

In the editing panel, provide details that Soda Cloud uses to determine which datasets to include or exclude when it profiles the columns in a dataset. The default syntax in the editing panel instructs Soda to profile every column of every dataset in this data source, and, superfluously, all datasets with names that begin with prod. The % is a wildcard character. See Add column profiling for more detail on profiling syntax.
Column profiling and automated anomaly detection can be resource-heavy, so carefully consider the datasets for which you truly need column profile information. Refer to Compute consumption and cost considerations for more detail.
5. Check
When Soda Cloud automatically discovers the datasets in a data source, it prepares automated monitoring checks for each dataset. These checks detect anomalies and monitor schema evolution, corresponding to the SodaCL anomaly detection and schema checks, respectively.
(Note that if you have signed up for early access to anomaly dashboards for datasets, this Check tab is unavailable as Soda performs all automated monitoring automatically in the dashboards.)
In the editing panel, specify the datasets that Soda Cloud must include or exclude when preparing automated monitoring checks. The default syntax in the editing panel indicates that Soda will add automated monitoring to all datasets in the data source except those with names that begin with test_. The % is a wildcard character.
(5) 6. Assign Owner
This tab is the fifth step in the guided workflow if the 5. Check tab is absent because you requested access to the anomaly dashboards feature.
Data Source Owner
The Data Source Owner maintains the connection details and settings for this data source and its Default Scan Definition.
Default Dataset Owner
The Datasets Owner is the user who, by default, becomes the owner of each dataset the Default Scan discovers. Refer to Manage roles and permissions in Soda Cloud to learn how to adjust the Dataset Owner of individual datasets.
Use a file reference for a BigQuery data source connection
If you already store information about your data source in a JSON file in a secure location, you can configure your BigQuery data source connection details in Soda Cloud to refer to the JSON file for service account information. To do so, you must add two elements:
volumesandvolumeMountsparameters in thevalues.ymlfile that your Soda Agent helm chart usesthe
account_info_json_pathin your data source connection configuration
You, or an IT Admin in your organization, can add the following scanlauncher parameters to the existing values.yml that your Soda Agent uses for deployment and redployment in your Kubernetes cluster. Refer to Google GKE instruction above.
Use the following command to add the service account information to a Kubernetes secret that the Soda Agent consumes according to the configuration above.
After you make both of these changes, you must redeploy the Soda Agent.
Adjust the data source connection configuration to include the account_info_json_path configuration, as per the following example.
Next
Choose a flavor of SodaSet up Soda: self-hosted agentRun scans and review results
Organize, alert, investigate
Need help? Join the Soda community on Slack.
Last updated
Was this helpful?